

티스토리 뷰
Hierarchical-style layouts (계층 구조 스타일)
In hierarchical style, the templates are usually created with a parent-child relation, from the more general part (layout) to the most specific ones (subviews; e.g. page content). Each component of the template may be included dynamically based on the inclusion and substitution of template fragments. In Thymeleaf this can be done using Thymeleaf Layout Dialect.
The main advantages of this solution are the reuse of atomic portions of the view and modular design, whereas the main disadvantage is that much more configuration is needed in order to use them, so the complexity of the views is bigger than with Include Style Layouts which are more “natural” to use.
- 출처 https://www.thymeleaf.org/doc/articles/layouts.html
타임리프 페이지 레이아웃에 계층 구조 스타일에 대한 설명. 구글 번역기로 돌려보면 이렇게 해석됨..
계층 적 스타일에서 템플릿은 일반 적으로보다 일반적인 부분 (레이아웃)에서 가장 구체적인 부분 (예 : 페이지 콘텐츠)에 이르기까지 부모-자식 관계로 생성됩니다. 템플릿의 각 구성 요소는 템플릿 조각의 포함 및 대체에 따라 동적으로 포함될 수 있습니다. Thymeleaf에서는 Thymeleaf Layout Dialect를 사용하여 수행할 수 있습니다.
이 솔루션의 주요 장점은 뷰 및 모듈 식 디자인의 원자 부분을 재사용하는 반면, 주요 단점은 이를 사용하기 위해 훨씬 더 많은 구성이 필요하므로 뷰의 복잡성이 Include Style Layouts보다 더 크다는 것입니다. 사용하기에 더 "자연스럽습니다".
번역을 돌려봤을 때 크게 어색하지 않다. 계층적 구조를 설명하기 전에 직접 페이지에 include 하는 방식을 설명하는데 include 방식은 구현하기 쉽고 이해하기 쉽지만 가장 큰 단점이 소스 코드 중복이 많다는 점이다.
그에 반해 계층구조 스타일은 header와 footer 그리고 contents 부분을 하나의 계층으로 만들어 놓고 실제 보여주는 page view 부분에는 contents라는 부분만 렌더링 해서 보여주기만 하면 된다.
일단 thymeleaf의 layout-dialect를 사용하려면 Thymeleaf Layout Dialect 의존성을 받아야 한다.

의존성을 추가하고 아래와 같이 계층구조를 생성한다.
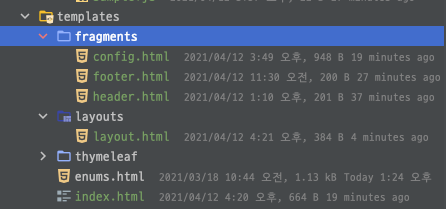
공통이 되는 layout.html
<!DOCTYPE html>
<html lagn="ko"
      xmlns:th="http://www.thymeleaf.org"
      xmlns:layout="http://www.ultraq.net.nz/thymeleaf/layout">

<head th:replace="fragments/config :: configFragment"></head>

<body>
    <!-- header 시작 -->
    <header th:replace="fragments/header :: headerFragment"></header>
    <!-- header 끝 -->
    <!-- content 시작 -->
    <div layout:fragment="content"></div>
    <!-- content 끝 -->
    <!-- footer 시작 -->
    <footer th:replace="fragments/footer :: footerFragment"></footer>
    <!-- footer 끝 -->
</body>

</html>
나만의 언어 방식으로 써보면 와꾸를 잡아주는 공통 layout.html 파일이다. th:replace에 밑에 config, header, footer html 파일들을 대체해서 넣어준다. 그리고 layout:fragment="content" 부분에 content(내용)가 들어가는 방식이다.
th:replace에서는 더블 콜론(::)을 기준으로 왼쪽은 fragment 파일 경로 오른쪽은 fragment 명(이름)을 적어주면 된다.
Config.html
<!DOCTYPE html>
<html
  xmlns:th="http://www.thymeleaf.org"
  xmlns:layout="http://www.ultraq.net.nz/thymeleaf/layout">

<head th:fragment="configFragment">
    <meta charset="UTF-8" />
    <!-- 공통으로 쓰이는 css파일을 넣는다.-->
    <link rel="stylesheet" th:href="@{css/bootstrap.min.css}">
    <!-- 컨텐츠페이지의 CSS 영역이 들어감 -->
    <th:block layout:fragment="css"></th:block>

    <!-- 공통으로 쓰이는 js 파일을 넣는다.-->
    <script th:src="@{js/jquery-3.6.0.min.js}"></script>
    <script th:src="@{js/bootstrap.min.js}"></script>
    <!-- 컨텐츠페이지의 스크립트 영역이 들어감 -->
    <th:block layout:fragment="script"></th:block>
  </head>
</html>
header.html
<!DOCTYPE html>
<html xmlns:th="http://www.thymeleaf.org">
<header th:fragment="headerFragment">
    <div class="bg-info m-5" >
        <h2>여기는 Header</h2>
    </div>
</header>
</html>
footer.html
<!DOCTYPE html>
<html xmlns:th="http://www.thymeleaf.org">
<footer th:fragment="footerFragment">
    <div class="bg-info m-5">
        <h2>여기는 Footer</h2>
    </div>
</footer>
</html>
index.html
여기 코드가 실제 contents가 위치하는 코드이다. 코드에서 layout:fragment="content" 태그 아래에 실제 콘텐츠를 작성해주면 된다.
<!DOCTYPE html>
<html xmlns:th="http://www.thymeleaf.org"
      xmlns:layout="http://www.ultraq.net.nz/thymeleaf/layout"
      layout:decorator="layouts/layout">

<!-- index.html 고유 CSS 추가 -->
<th:block layout:fragment="css"></th:block>

<!-- index.html 고유 스크립트 추가 -->
<th:block layout:fragment="script">
    <script th:src="@{js/sample.js}"></script>
</th:block>

<div layout:fragment="content" class="bg-success m-5">
    index.html 입니다. 즉 컨텐츠 영역
</div>
</html>
layout:fragment="css" 부분에 현재 페이지에서 고유하게 사용할 css를 작성해주면 된다.
layout:fragment="js" 부분도 마찬가지이다. 현재 코드에서 sample.js를 추가해주면 공통 js를 포함한 sample.js도 포함된다.
thymeleaf dialect layout으로 검색해보면 기존 사람들이 모두 위처럼 설명해 주는데 실제로 반영해보면 WARN 메시지가 나타난다.
WARN 메시지
WARN 38747 --- [nio-8080-exec-1] n.n.u.t.decorators.DecoratorProcessor    : The layout:decorator/data-layout-decorator processor has been deprecated and will be removed in the next major version of the layout dialect.  Please use layout:decorate/data-layout-decorate instead to future-proof your code.  See https://github.com/ultraq/thymeleaf-layout-dialect/issues/95 for more information.
WARN 38747 --- [nio-8080-exec-1] n.n.u.t.expressions.ExpressionProcessor  : Fragment expression "layouts/layout" is being wrapped as a Thymeleaf 3 fragment expression (~{...}) for backwards compatibility purposes.  This wrapping will be dropped in the next major version of the expression processor, so please rewrite as a Thymeleaf 3 fragment expression to future-proof your code.  See https://github.com/thymeleaf/thymeleaf/issues/451 for more information.
WARN 38747 --- [nio-8080-exec-1] n.n.u.t.fragments.FragmentProcessor      : You don't need to put the layout:fragment/data-layout-fragment attribute into the <head> section - the decoration process will automatically copy the <head> section of your content templates into your layout page.
첫 번째 경고 메시지부터 살펴보면 layout:decorator는 메이저 버전 layout-dialect에서 deprecated 되었으니 layout:decorate 대신해서 사용하라는 경고이다. layout:decorator를 작성해주는 부분은 content (내용)가 들어가는 부분에 있다.
두 번째 경고 메시지도 content(내용)에 있는 html 파일 부분으로 layout:decorate의 표현식 방법을 (~{...}) 이렇게 바꾸라고 안내하고 있다.
세 번째 경고 메시지는 layout.html 파일에 있는 head 조각을 fragment로 넣을 필요가 없다는 이야기이다. 즉 contents 부분에 head를 작성하면 자동으로 레이아웃 페이지에 복사한다는 말이다.
Hanumoka IT 블로그에서 작성하신 글은 경고 메시지까지 수정해서 반영하신 글까지 있다. (이걸 참조하는 게 빠르다..)
경고 메시지를 삭제하기 위해서 layout.html 파일을 수정하면 아래와 같다.
layout.html 수정

<!DOCTYPE html>
<html lagn="ko"
      xmlns:th="http://www.thymeleaf.org"
      xmlns:layout="http://www.ultraq.net.nz/thymeleaf/layout">
<head>
    <meta charset="UTF-8" />
    <!-- 공통으로 쓰이는 css파일을 넣는다.-->
    <link rel="stylesheet" th:href="@{css/bootstrap.min.css}">
    <!-- 공통으로 쓰이는 js 파일을 넣는다.-->
    <script th:src="@{js/jquery-3.6.0.min.js}"></script>
    <script th:src="@{js/bootstrap.min.js}"></script>
</head>
<body>
    <!-- header 시작 -->
    <header th:replace="fragments/header :: headerFragment"></header>
    <!-- header 끝 -->
    <!-- content 시작 -->
    <div layout:fragment="content"></div>
    <!-- content 끝 -->
    <!-- footer 시작 -->
    <footer th:replace="fragments/footer :: footerFragment"></footer>
    <!-- footer 끝 -->
</body>

</html>
head의 fragment를 없애고 config 파일에 공통으로 들어갔던 css와 js를 작성해준다.
index.html 수정 (콘텐츠 부분)

<!DOCTYPE html>
<html xmlns:th="http://www.thymeleaf.org"
      xmlns:layout="http://www.ultraq.net.nz/thymeleaf/layout"
      layout:decorate="~{layouts/layout}">

<head>
    <script th:src="@{js/sample.js}"></script>
</head>

<div layout:fragment="content" class="bg-success m-5">
    index.html 입니다. 즉 컨텐츠 영역
</div>
</html>
기존 layout:decorator에서 layout:decorate로 변경
layouts/layout에서 ~{...} 표현 형식으로 변경 ~{layouts/layout}
이제 head 부분에 이 페이지에서 사용할 script 나 css를 작성해주면 코드가 복사된다. 실행하고 페이지 소스보기를 하면 복사된 것을 확인할 수 있다.

참고
스프링 부트에 layout-dialect 적용하기 www.hanumoka.net/2020/05/21/springBoot-20200521-springboot-thymeleaf-layout-dialect/
실습 소스 github.com/sskim91/java-spring-lab/tree/main/sample-thymeleaf
- Total
- Today
- Yesterday
- Java
- mybatis config
- 오라클
- 베리 심플
- docker
- Kotlin
- localtime
- JavaScript
- svn
- oracle
- Linux
- Mac
- maven
- jQuery
- Spring Security
- springboot
- LocalDate
- LocalDateTime
- window
- 북리뷰
- intellij
- k8s
- Spring
- elasticsearch
- input
- config-location
- mybatis
- rocky
- claude
- Bash tab
| 일 | 월 | 화 | 수 | 목 | 금 | 토 |
|---|---|---|---|---|---|---|
| 1 | 2 | 3 | 4 | 5 | 6 | 7 |
| 8 | 9 | 10 | 11 | 12 | 13 | 14 |
| 15 | 16 | 17 | 18 | 19 | 20 | 21 |
| 22 | 23 | 24 | 25 | 26 | 27 | 28 |
| 29 | 30 |